Showing posts with label Vikings. Show all posts

Sunday, April 28, 2013

Viking Warlord...4 pt Warband complete!

O.K., a four point SAGA warband is small but it should be perfect for teaching the rules to the gaming club.  I finally finished up my Gripping Beast plastic Viking warlord to complete my small warband.  I have blisters of Viking berserkers and archers to grow the group in the near future....but at least what I have can be thrown down for a small game.  On this model I made heavy of Reaper Model Color triads on this particular figure(for the hair, flesh, white tunic and green cape).  
To spice him up a little but I added a custom strap to his shield and added some arrows to his base(made from sewing pins and green stuff). 
And here he is with a unit of hearthguard as escorts...
I am now nine figures away from having my 4 pts Anglo-Dane warband done...having painted a total of 33 figures in about five weeks(not bad all things considered).  Now if I can just remain disciplined enough to complete this project before my Infinity rulebook arrives and I get excited about the next game system....

Sunday, April 07, 2013

Viking Warband(-1): Spring Break Painting!

My goal during this Spring Break vacation(today is the last day) was to paint a 4 Point Viking Warband for SAGA in 8 days...but I was a Warlord short!  That being said, for about a week's worth of effort, I did get 20 figures painted which is a nice start. 

First, here are the last four Viking Hearthguard(Gripping Beast Plastics) I did to complete my (warlord-less) warband...
Here is a close up of one of the men...
I used green stuff to give these guys appropriately longer locks this time around...
Here are another four Hearthguard I did the other day...
So that brings up my force to 20 strong...
On Left: 3 Viking Hearthguard Units(3 x 4 men), On Right: 1 Viking Warrior Unit(8 men)

Painting the shields is definitely the most challenging, but most rewarding, part of the process. 

So what's next?  The following:
-prime and paint Viking warlord
-begin assembling and painting Anglo-Danish Hearthguard(bought the Saxon GP plastics)
-begin assembling and painting Anglo-Danish slinger levy unit
-awaiting Viking Berserkers and Anglo-Danish Huscarls in the mail
-continue to knock off some more Dark Ages terrain

I am also helping my 15 and 9 year olds with their painting...they are painting up some Super Dungeon Explore minis.  Once I have two small SAGA warbands ready, I'll put them to work helping me try out the rules!

Well, that's it for now...
~Gareson

Saturday, April 06, 2013

Basing With Lumina Air Drying Clay

Now that I've been modeling miniatures on various types of bases across multiple game systems over the last few years I've finally found a basic basing solution that I am really happpy with.  I've used all of the following with success over time:
1.Vallejo Pumice and Stucco
2.Spackle(filler for those in the U.K.)
3.Green Stuff
4.Milliput
5.Cork
6.Wet Modeling Clay
However, the last few months I have been using Lumina Air Drying Clay which, to me, has become the ideal basing material. 
I chose to base my Saga miniatures on Privateer Press 30mm slotted bases rather than the Renedra ones because I wanted a lip around the mini's base that I could paint a slightly different color for each faction so on the gaming table one could quickly tell "who is who".  Of course, as with most bases, this brings about a situation where one has to add material to the base to disguise the original plastic base of the mini(the block beneath his feet).  Also, as the PP bases are slotted, that has to be covered as well. Please keep in mind, this technique will work with any bases you place your minis on...not just round or slotted ones.  Lastly, yes you can do this type of basing detail before priming and painting...I just prefer to do it at the end. 
Start by pinching on a very small(and I mean small) bit of clay and working it into a small snake with your fingers...this will do most of the work in sculpting up the base.
Lay the clay around original base of the mini where it meets your new base(my 30mm one in this case) and use your fingers to smooth it out creating a gradual rise from the new base to the miniature's block.  If your figures are a little too clumsy or there are some tight spots, use the flat of an x-acto knife blade to flatten out the clay.
Uh oh....my snake didn't cover all of the slot....what do I do?  Easy, just roll a little ball of clay to place on that part of the base and...
boom!...no problem!(sounds like an infomerical, sorry). Now here is one of the real advantages of this particular clay(Lumina).  In under 10 minutes it is dry enough for me to base my grit(sand/kitty litter) over; with putties and filler I have to wait a lot longer!
After I paint a little Mod Podge(watered down PVA essentially) on the base I dip him in my basing material.  In just a matter of minutes(from no clay to fully textured) my figures look like this...
Now I just have to paint up the base texture(for a tutorial head to this post) and the base lips and these four guys can join the rest of their unit...
Let me conclude with all the reasons I love this air drying clay for basing and why it is my new norm for finishing a figure.
1. It is very easy to work with.  Unlike two party putty(Green Stuff/Milliput) it is not the least bit tackey so you needn't worry about keeping fingers or sculpting tools wet.
2. It is entirely sculptable.  You can carve bricks, patterns, etc. into the clay with such ease!  You can do this while it sets or after it dries. 
3.  It is inexpensive.  The block of clay I purchased off Amazon for $10 will last me for hundreds of figures.  I used about 1/50th of the block for the four figures shown in the example. 
4. The stuff dries like hard plastic...it IS NOT going to flake or chip.  It feels like the original plastic of the mini once it dries.
5. It paints well.  The Lumina clay, once primed will take hold paint as well as any other plastic.

I assume there are other air drying polymer clays out there that will work as well as the Lumina...if you know of some feel free to post them in the comments section.  Here are some other non-Saga figures I have based with the same material...
Soviet 20mm Plastic Soldier Company Minis


15mm Elves modded for BattleLore boardgame with Lumina Clay bases(the
hole to hold the banner was easily made with the clay as well!).

 
Well that's it for now...I hope you found this tutorial helpful.
~Gareson


Friday, April 05, 2013

Vikings Warrior Unit Completed...

My quest to complete a warband before Spring Break ends continues...
I finished four more Wargames Factory Viking Bondi figures to complete a unit of warriors for Saga.

Wargames Factory Viking Bondi...Father Comstock is on the right!(Bioshock Infinite reference).
Before purchasing these guys most reviews I read(and watched) suggested that they were fairly lowe on detail...an assessment with which I must concurr.  That being said, I did the best I could to paint them up.  I am still glad I made the purchase because the pricepoint is very fair and the extreme variety of possible poses is great.  Furthermore, they will allow me to quickly roll out an inexpensive force(coupled with the Gripping Beast plastic Vikings) that I could later upgrade with nicer sculpts if I so desire.   I have decided to use the Gripping Beast shields with these warriors and the Wargames Factory ones with the Gripping Beast Hearthguard. The Wargames Factory ones are actually more detailed and I like them better for the better equipped warriors...whereas the simpler ones in the GB plastic set seem better suited to these warriors.  

"Turn around, I heard something!"...nah, master just wants to show our paintjob from behind!
With the above four figures I now have a unit of warriors(8 strong) to add to my warband.  I should mention that in an effort to speed paint the figures I used my "magic wash" of Pledge/Water/Brown Ink/Black Ink to bring out the details.  Here is the group shot of the full unit..

"By the might of Thor, charge!!!!!!!!!!!!!!!!!!!!!!!"
Thanks for viewing and happpy wargaming everybody!
~Gareson

Monday, April 01, 2013

Viking Warriors for Saga(1/2 point)

My endeavor to complete the painting of a small Viking warband for Saga over my vacation continues.  This time, I've done 1/2 a unit of Viking Warriors...
(click photos for larger images)
These figures were also plastics but from Wargames Foundry(their "Viking Bondi" set).  I really like the poseability of these figures although the details are rather subtle.  However, for medium/low quality Dark Ages warriors...they would have simple gear.
I used quite an array of paints to mix up the colors on the guys.  By the time I was done I realized just how many ranges I had utilized: Vallejo Model Color, Vallejo Game Color, Vallejo Model Air, Reaper Master Series, Reaper HD, P3 Paints, Wargames Foundry and even some 30 year old Ral Partha paint pots!  The pelt on the figure to the left was hand made from Lumina air drying clay...which is quickly become my favorite modeling tool!
I like the shields on the Wargames Foundry figures better than the Gripping Beast ones...because I like the rivets around the edge.  I debated whether or not to paint the rim as metal or leather...I opted for the latter(I did some internet research and found that both were used).
Painting the shields on these guys is definitely the most challenging but fun part of the project.  Below you can see how I carved some planks into the shield with an x-acto knife...I figured for my lesser quality warrior troops they might not have the fancy shield coverings..
And finally, the bald guy....
I am going to do a another unit of Hearthguard before I do the other 1/2 of this warrior unit.  I like to paint no more figures than four at a time to avoid unit painting burnout. 

That's all for now....happy belated Easter to everyone!
~Gareson

Friday, March 29, 2013

The Saga Begins...

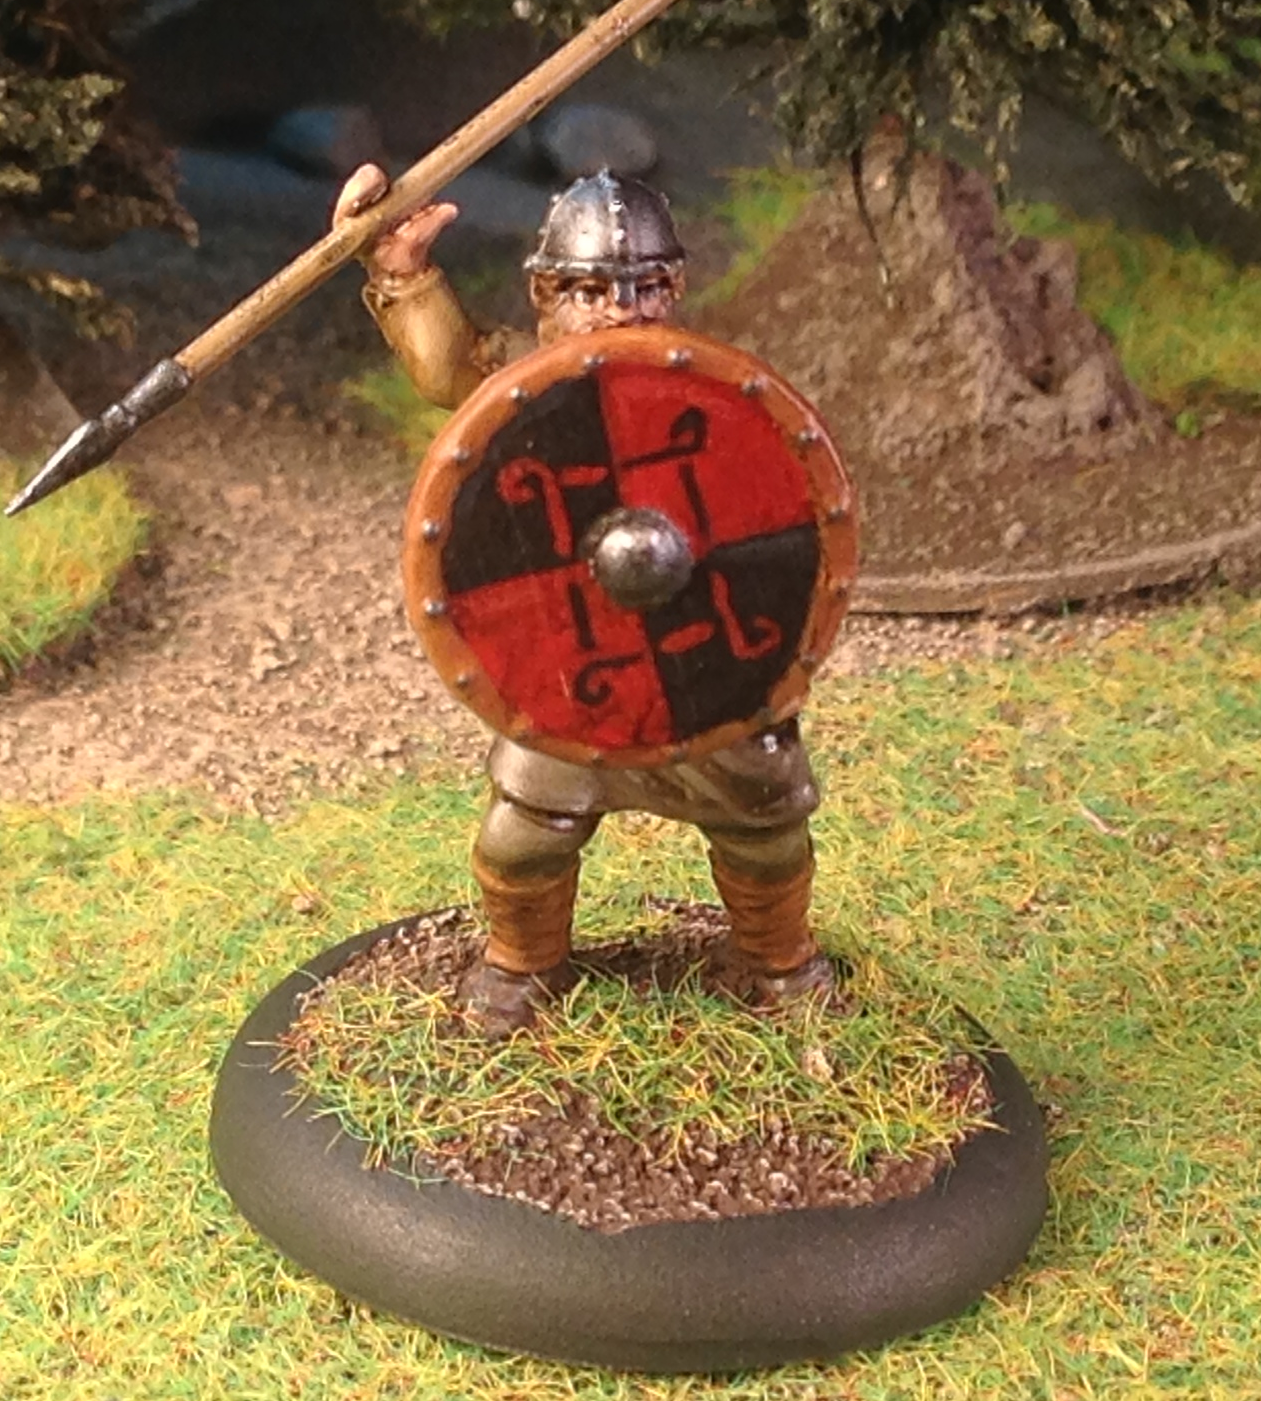
Well...it's a start.  Now that Battlegroup Kursk has been giving me the historical wargamign itch again, I have been searching for another era to game.  I think I found the game: Saga-Dark Ages Skirmish Game. Here are my first footsoldeirs which are the beginning of my Viking warband.  Hearthguard...
Well it has been a while since I did 28mm figures and, as you can see, I am darn rusty!  It's o.k. though because I know within the next 4-8 figures I'll have my brush control back. 

That being said, I loved these little guys from Gripping Beast's plastics range.  I assembled these guys and painted them within just a few hours.  I'll probably end up springing for the shield decals by Gripping Beast but I wanted to do some freehand ones(I feel like I'm cheating with decals!). 
My plan is to build a Viking warband as well as an Anglo-Danish one.  Then I can introduce the game to my students in the Military History Club....I think they'll like it.  My Saga rulebook is backordered from Michigan Toy Soldier Company(remind me to rant about their customer service sometime...). 
As I am at the beginning of my Spring Break, I am hoping to have a small Viking warband done before my vacation is over.

Thanks for viewing...
~Gareson