Gareson's Celebration of Everything Warmachine(and Hordes), Saga(Dark Ages) as well as World War II wargaming in 20mm!
Friday, August 12, 2011
Basing 101: Dirt Texture
There are few things as sad as a wonderfully painted miniature on a plain, undecorated base....especially when a basic texture effect is so easily achieved cheaply and quickly. This is Basing 101: using sand as dirt texture for your wargaming mini. Now for veterans this is a 'no brainer'...a tried and tested method for quickly getting your mini finished and table-ready. So my audience for this post are mainly those new to the hobby(although hopefully there will be a trick or two of some use to veterans as well).
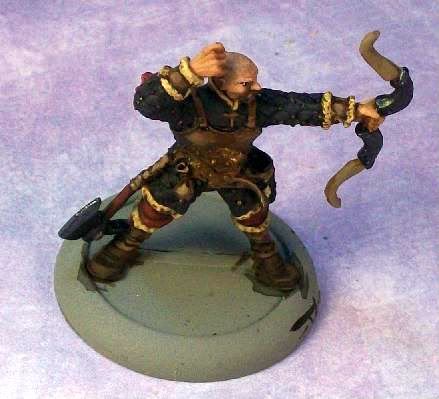
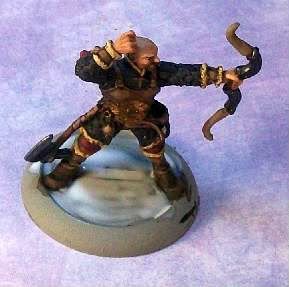
Here is my sad little Kossite Woodsman who is embarrassed by his plain base. Now Kossites, according to Warmachine rules, can deploy onto the table later in the game using their "Ambush" tactic. This guy, however, might resist ever coming on to the table for the shame of his undecorated base!...
(click on any images for larger pictures if needed)
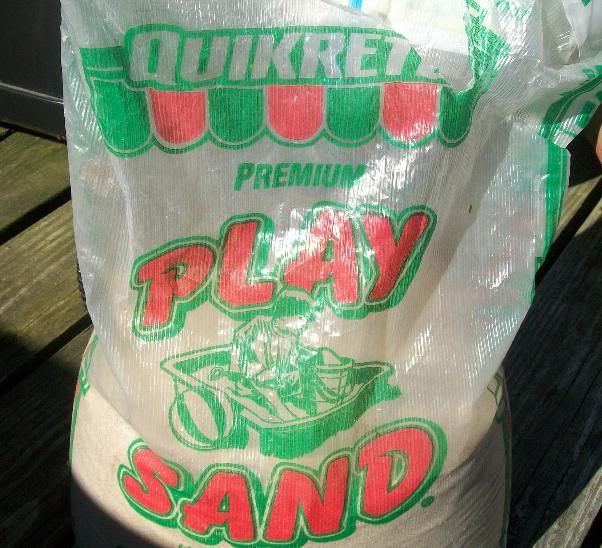
The good news is that with some inexpensive tools, and minimal time, he will have a base he can be proud of! Let's talk materials: sand, old paint brush & Mod Podge(or white glue)...that's it. Let's talk sand first. For about $5 you can get a bag of sand at the hardware store that will likely be all that you'll ever use. What you are looking for is a sand with a natural, beach-like texture which has variable grains in it. I like Quikrete's Play Sand(but if you live near a beach, nature has already provided of course).
But be careful with "Play Sand"...you don't want the uniform, bleached-white stuff. This also goes for "Craft" or "Scenic" sand like you'll find at Michael's...its a processed, fine grit sand that won't look natural when you paint it..don't use it.
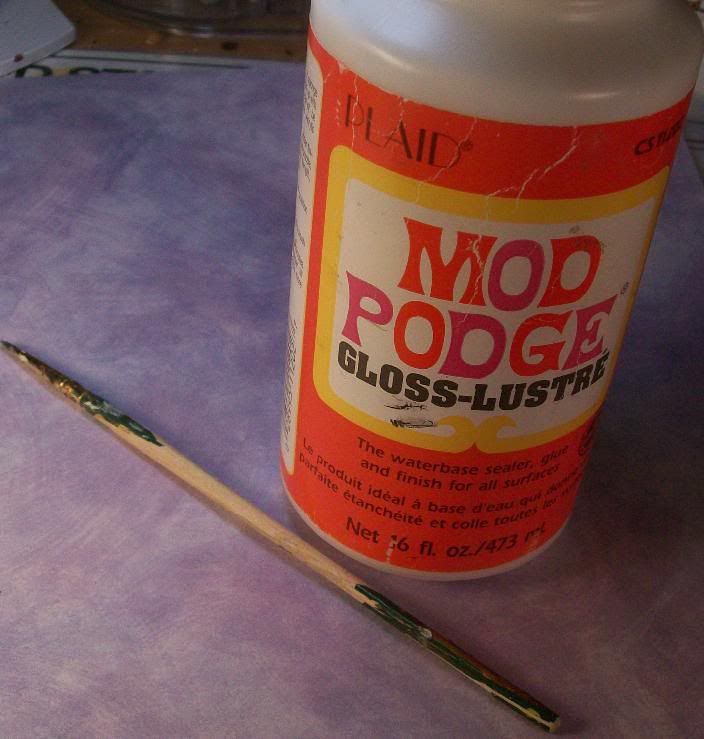
As far as adhesive you can go two routes; you can use watered down white glue or a craft sealer such as Mod Podge. I like Mod Podge because it essentially is watered-down glue right out of the container...no need for an extra step! Use and old paint brush(not one for miniature details)...you can clean it up with water afterwards(white glue and Mod Podge are both water-based)...but why use a nice brush if you don't have to?
With materials out of the way, let's talk process(and uber-easy process).
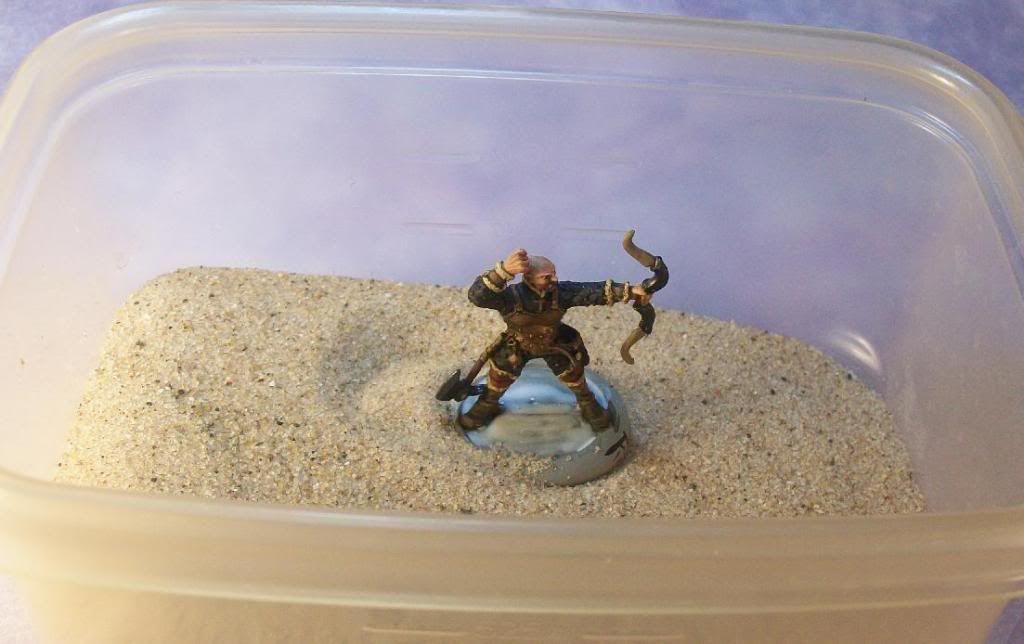
Step 1: Applying Adhesive-Avoiding the miniature itself, apply the Mod Podge(or glue) around the base of the miniature. Also try to avoid getting the adhesive on the outside lip of the base. If there is a little "dip"(recess) where the slotted bottom of the figure is embedded, be sure to fill it in with your adhesive.
Step 2: Applying Sand-Take your miniature and "dip" it into your sand container in a sidways motion, making sure the base is submerged in the sand. Once the base is saturated with sand, tilt the figure sideways and shake off excess grit. Also, after you take out the mini, blow on its base to remove any loose sand.
Step 3: Sand Clean-Up-Look at your mini, if there is sand glued on the outside of the lip, simply use your finger to wipe it off(so that the round edge of your base remains untextured).
At the tip of the red arrow you can see the excess
sand that I will wipe off.
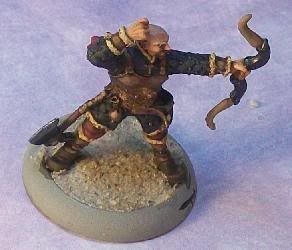
At this point your mini should look something like this...
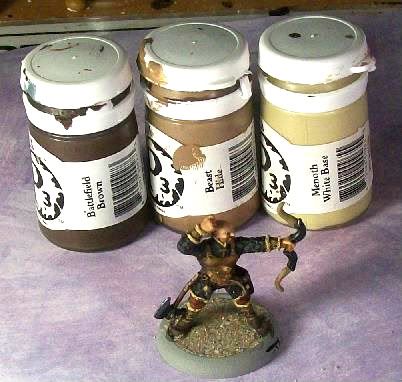
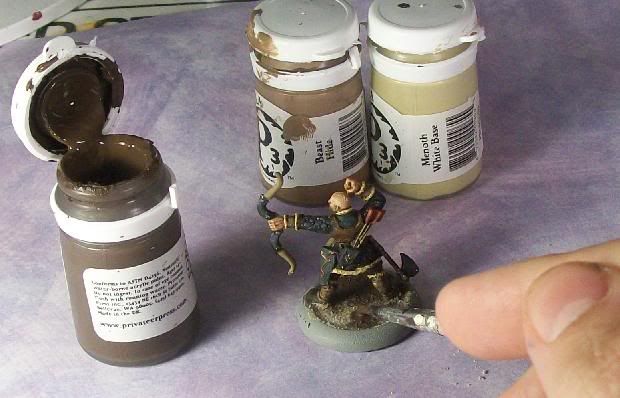
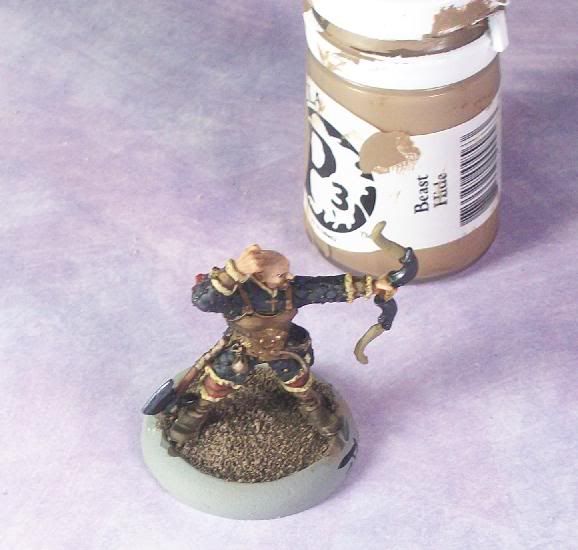
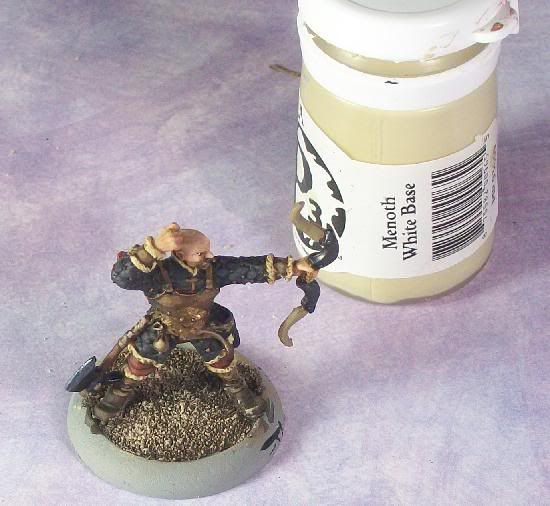
After letting the sand dry(30 minutes should do) you can apply a base coat of paint to your miniature. I take a three step, quick approach to this for simple dirt basing. I use a basecoat of P3's Battlefield Brown(Dark Brown), followed by successively drybrushed highlights of P3 Beast Hide(Dark Tan) and then P3 Menoth White Base(Light Tan/Beige). Here is my mini and my paints readied....
Step 4: Basecoat Paint- Open your Battlefield Brown(or similar paint) paint pot. Load your brush with water before dipping it into the paint...we want a "runny" load of paint on the brush. When you put the tip of your watered-down paint on the base, the paint will be "soaked up" by the dry sand and naturally travel across the base on its own. The beauty of this is that you don't need to put your brush near the feet of your mini(or cape, etc.) and risk painting over your miniature. It's a neat trick...
Of course, if you use dropper bottles for your paint(such as Vallejo, Reaper), just water down your paint on your palette. Whichever method you employ, don't water down your paint too much or there won't be enough pigment and the sand's natural color will show through...experiment to get the blance right(you can always paint over your first layer if it was too thin). Your basecoated mini should be left to dry before you go on to the next step(put it under a hot lamp to speed up the process if you want).
Step 5: First Highlight- Time for some drybrushing fun. Take your middle hue(mine is P3 Beast Hide) and grab a nice drybrush. Put some paint on the tip of your brush and wipe off most of it on a paper towel until just a little pigment is remaining. Drybrush the base of your figure in a sideways motion make the sand grain details start to "pop". I don't worry if I hit the feet/boots of the figure a little as this gives them a traveled, dusty look...but you can avoid this if you so choose.
Step 6: Second(High) Highlight- Now we're going to emulate Step 5 but with a lighter color(P3 Menoth White Base/light tan). You don't need to clean your brush in between steps 5 & 6 so long as you brushed off most of your paint from step 5. Load the tip of your brush with your lightest paint and brush most of it off on a paper towel(as with previous step). Drybrush this color onto your base to further accentuate the dirt(sand) details. You're almost done!
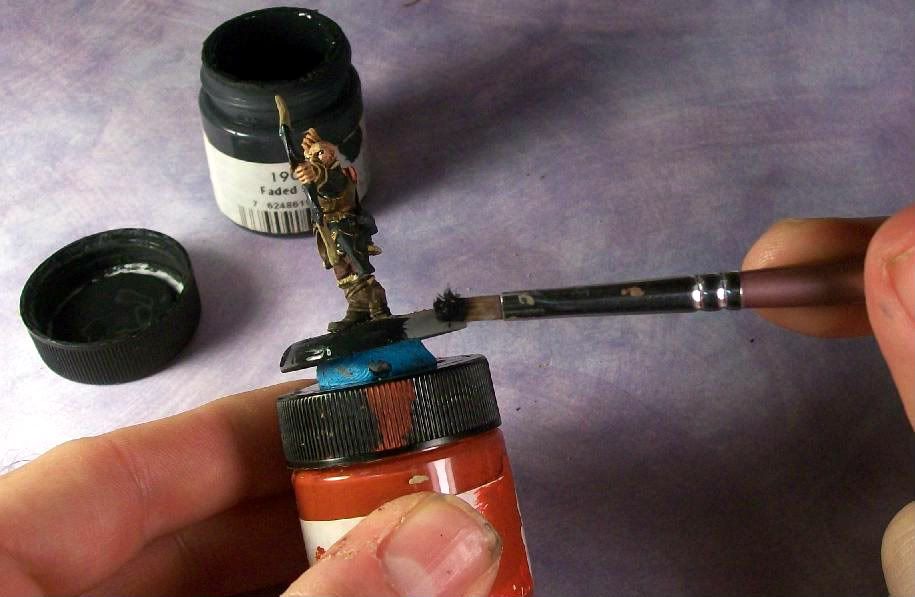
Step 7: Base Clean-Up- Well at this point with all the sand texturing, base-coating and drybrushing, the side lip of your base likely needs a little cleaning up. We're going to go around the lip of the mini with a flat black paint to finish him(I actually MUST do this because, as you can see, I had primed my miniature in grey). For this step I like to attach my mini to an old paint pot(or bottlecap) using a little dab of poster putty. This allows me to paint around the edges neatly and allows the paint to dry without making contact with your desk surface. You can see the simple process below...
Ignore the paint pot color, its just being used as a temporary base.
And that's about it! Now a couple of things to keep in mind...
1. The dirt texture looks nice enough, and is table ready, but you can always add details like static grass, grass tufts, leaf scatter, moss(see this tutorial) or snow(which is what this Kossite will be getting!).
2. In the tutorial I painted just one mini...if its a unit you would do one step at a time for all your minis(as a batch).
3. By changing the hues you can use the same texture for a differently themed base. Want your sand to represent a desert base?...use Beast Hide(Dark Tan) as your base and then highlight with Menoth White Base(light tan/beige) and then Menoth White Highlight(ivory) successively.
If you would prefer a video walkthrough of this simple method, I have uploaded one to my Youtube Channel. You can watch the embedded videos below(or double click on them for full screen, HD versions):

No comments:
Post a Comment